Recently i searched for a way to clean up my tinkering corner in my work room. Like many others i stumbled upon the Ikea SKADIS pegboard series and was hooked - literally. The internet is full of STL files to 3d-print various hooks, shelves and mounts for different objects for this board, so i booted my Ender 3 and went ahead.
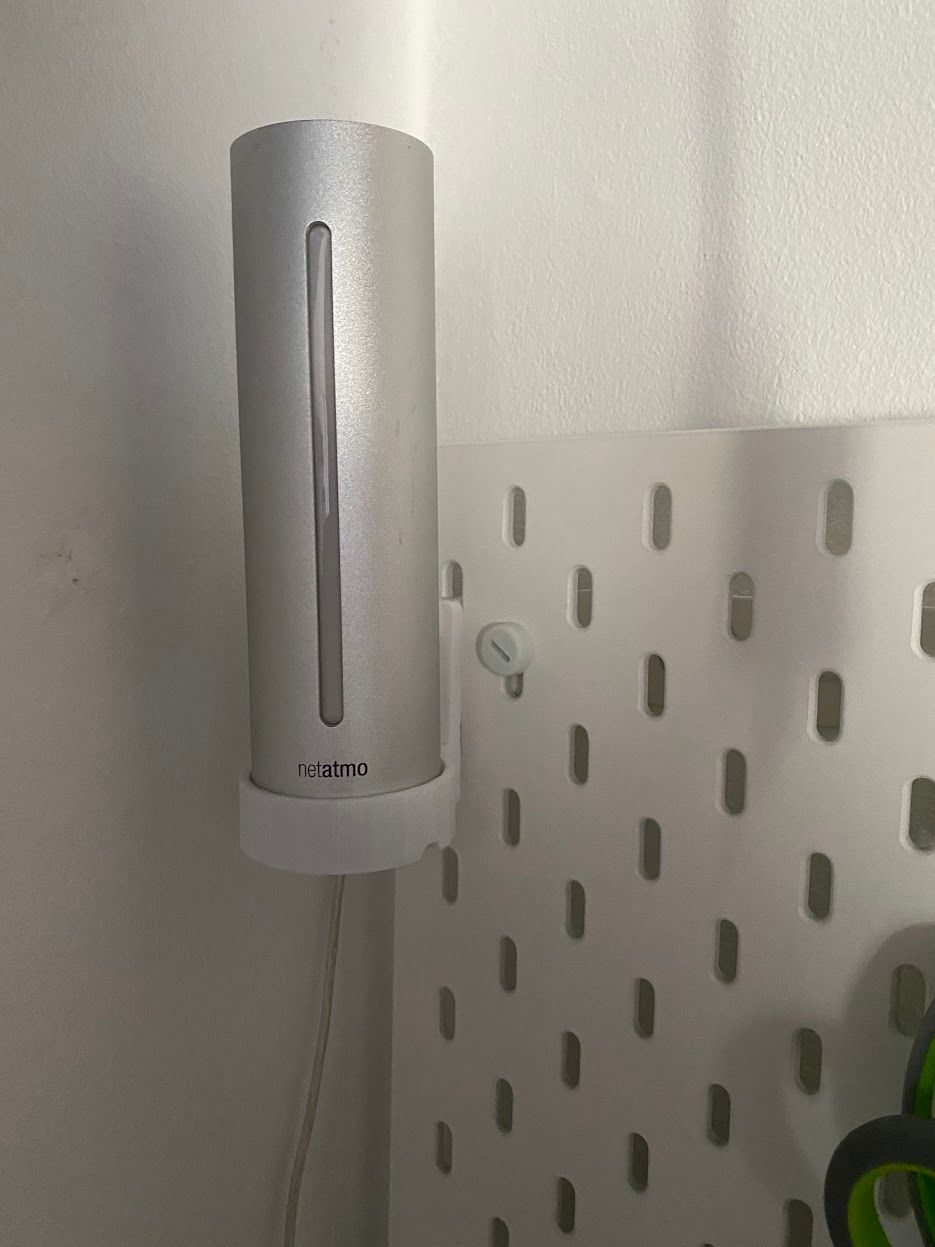
During this process i also wanted to mount the base station of my Netatmo weather station to this board, since it currently was just sitting on a table in the corner of my room. I was hoping, when placing it somewhere elevated, i could see its LED for indicating the air quality a bit better - not that i pay that much attention to it, but anyways.
Unfortunately, there were no suitable designs on the usual trusty source of STL files, Thingiverse. So i took that as an opportunity to master my skills in TinkerCAD and designed my own. I had a mount for the outdoor sensor to orient myself on, just exchanging the mount point from two holes for countersunk screws to the awesome SKADIS universal hook.
It turned out, TinkerCAD gets complicated very quickly, since its toolset is somehow limited. For example, one can’t simply make an edge rounded - no, one has to create a disjunction between a cylindric hole and a cube, change the resulting element to a “hole”, and apply that hole to the edge. So, this may be my first and last thing ever i created with TinkerCAD.
When exporting the part, which was designed as a tight fit around the base, it also turned out that TinkerCAD renders a circle as a somewhat coarse polygon, so the base did not fit into my first prototype, and i had to increase the diameter.
In any case, i think the result turned out pretty well:
If you are interested in printing one yourself, here are the relevant links:
Lessons learned for myself: Don’t use simple tools if the task grows more complex than these tools could handle. I took that as an opportunity to learn the usage of Fusion360.
This post also is my contribution to the One thing a week challenge - Week 1.